布局切换动画在Material design中是一个重要的方面,因为它们能够指明应用的工作流程,并且能够将UI上的可视化元素绑定在一起作为用户的导航。两个重要的工具可以实现这种效果,分别为Activity转场动画和布局动画(Layout Transitions)。然后布局动画需要在API 19及其之后才支持。在这一系列文章中,我们会学习到即使在无法调用transitions APIs时如何实现很好的转场动画。
布局切换框架引入了代表特定布局状态的Scenes概念,也就是场景。我们会定义两个分离的布局来模仿这些,其中一个代表默认的视图,另一个代表我们进入输入模式的视图。我们先来创建两个布局,它们都是基于Dirty Phrasebook布局,当然我们会做一些小修改以便大家能够更容易理解。
首先是默认布局。
res/layout/activity_part2.xml
1
2
3
4
5
6
7
8
9
10
11
12
13
14
15
16
17
18
19
20
21
22
23
24
25
26
27
28
29
30
31
32
33
34
35
36
37
38
39
40
41
42
43
44
45
46
47
48
49
50
51
52
53
54
55
56
57
58
59
60
61
62
63
64
65
66
67
68
69
70
71
72
73
74
75
76
77
78
| <?xml version="1.0" encoding="utf-8"?>
<LinearLayout xmlns:android="http://schemas.android.com/apk/res/android"
android:layout_width="match_parent"
android:layout_height="match_parent"
android:orientation="vertical"
android:clipChildren="false">
<RelativeLayout
android:layout_width="match_parent"
android:layout_height="0dp"
android:layout_weight="1">
<View
android:id="@+id/toolbar"
android:layout_width="match_parent"
android:layout_height="?attr/actionBarSize"
android:background="?attr/colorPrimary" />
<View
android:id="@+id/focus_holder"
android:layout_width="0dp"
android:layout_height="0dp"
android:focusableInTouchMode="true">
<requestFocus />
</View>
<android.support.v7.widget.CardView
android:id="@+id/input_view"
android:layout_width="match_parent"
android:layout_height="match_parent"
android:layout_alignParentBottom="true"
android:layout_below="@id/toolbar">
<EditText
android:id="@+id/input"
android:layout_width="match_parent"
android:layout_height="match_parent"
android:inputType="textMultiLine" />
<ImageView
android:id="@+id/input_done"
android:layout_width="32dip"
android:layout_height="32dip"
android:layout_alignBottom="@id/input"
android:layout_alignEnd="@id/input"
android:layout_alignRight="@id/input"
android:layout_gravity="bottom|end"
android:layout_margin="8dp"
android:background="@drawable/done_background"
android:contentDescription="@string/done"
android:padding="2dp"
android:src="@drawable/ic_arrow_forward"
android:visibility="invisible" />
</android.support.v7.widget.CardView>
</RelativeLayout>
<FrameLayout
android:layout_width="match_parent"
android:layout_height="0dp"
android:layout_weight="1">
<android.support.v7.widget.CardView
android:id="@+id/translation"
android:layout_width="match_parent"
android:layout_height="wrap_content"
android:layout_margin="8dp">
<View
android:layout_width="match_parent"
android:layout_height="100dp"
android:background="?attr/colorPrimary" />
</android.support.v7.widget.CardView>
</FrameLayout>
</LinearLayout>
|
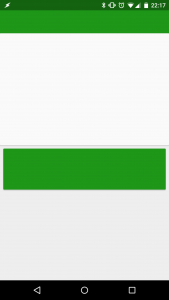
这个布局与我们上一篇使用的布局基本一致,但是稍微有一点小修改。现在我们感兴趣只有id为toolbar, focus_holder, input, input_view, input_done和 translation的视图控件。
它看起来是这样的:
The layout for when we’re in input mode is:
下面是进入输入模式的布局 :
res/layout/activity_part2_input.xml
1
2
3
4
5
6
7
8
9
10
11
12
13
14
15
16
17
18
19
20
21
22
23
24
25
26
27
28
29
30
31
32
33
34
35
36
37
38
39
40
41
42
43
44
45
46
47
48
49
50
51
52
53
54
55
56
57
58
59
60
61
62
63
64
65
66
67
68
69
70
71
72
73
74
75
76
77
78
79
80
| <?xml version="1.0" encoding="utf-8"?>
<LinearLayout xmlns:android="http://schemas.android.com/apk/res/android"
android:layout_width="match_parent"
android:layout_height="match_parent"
android:orientation="vertical"
android:clipChildren="false">
<RelativeLayout
android:layout_width="match_parent"
android:layout_height="0dp"
android:layout_weight="1">
<View
android:id="@+id/toolbar"
android:layout_width="match_parent"
android:layout_height="?attr/actionBarSize"
android:background="?attr/colorPrimary" />
<View
android:id="@+id/focus_holder"
android:layout_width="0dp"
android:layout_height="0dp"
android:focusableInTouchMode="true" />
<android.support.v7.widget.CardView
android:id="@+id/input_view"
android:layout_width="match_parent"
android:layout_height="match_parent"
android:layout_alignParentBottom="true"
android:layout_alignParentTop="true"
android:layout_marginBottom="?attr/actionBarSize">
<EditText
android:id="@+id/input"
android:layout_width="match_parent"
android:layout_height="match_parent"
android:inputType="textMultiLine">
<requestFocus />
</EditText>
<ImageView
android:id="@+id/input_done"
android:layout_width="32dip"
android:layout_height="32dip"
android:layout_alignBottom="@id/input"
android:layout_alignEnd="@id/input"
android:layout_alignRight="@id/input"
android:layout_gravity="bottom|end"
android:layout_margin="8dp"
android:background="@drawable/done_background"
android:contentDescription="@string/done"
android:padding="2dp"
android:src="@drawable/ic_arrow_forward"
android:visibility="visible" />
</android.support.v7.widget.CardView>
</RelativeLayout>
<FrameLayout
android:layout_width="match_parent"
android:layout_width="match_parent"
android:layout_height="0dp"
android:layout_weight="1">
<android.support.v7.widget.CardView
android:id="@+id/translation"
android:layout_width="match_parent"
android:layout_height="wrap_content"
android:layout_margin="8dp"
android:visibility="invisible">
<View
android:layout_width="match_parent"
android:layout_height="100dp"
android:background="?attr/colorPrimary" />
</android.support.v7.widget.CardView>
</FrameLayout>
</LinearLayout>
|
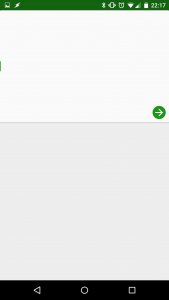
该布局和上一布局也是基本相同,它们的区别在于 :
- id为input_view的视图现在依附在它的父视图的顶部,而不是在toolbar的下面,也就是说它现在覆盖住了toolbar;
- input_done视图现在已经变为可见状态,上一个布局中它是invisible状态;
- translation视图变为invisible,上一布局中它是visible状态。
效果如下 :
两个布局代表UI的两个状态,如果我们使用Transitions API那么它们就是我们所谓的场景。
我们现在要做的就是在这两个布局之间进行状态切换,也就是进入、退出输入模式。首先我们需要检测MainActivity中的焦点 :
part2/mainActivity.java
1
2
3
4
5
6
7
8
9
10
11
12
13
14
15
16
17
18
19
20
21
22
23
24
25
26
27
28
29
30
31
32
33
34
| public class MainActivity extends AppCompatActivity {
private View input;
private TransitionController focusChangeListener;
private View.OnClickListener onClickListener;
private View focusHolder;
@Override
protected void onCreate(Bundle savedInstanceState) {
super.onCreate(savedInstanceState);
focusChangeListener = Part2TransitionController.newInstance(this);
onClickListener = new View.OnClickListener() {
@Override
public void onClick(@NonNull View v) {
focusHolder.requestFocus();
}
};
setContentView(R.layout.activity_part2);
}
@Override
public void setContentView(int layoutResID) {
if (input != null) {
input.setOnFocusChangeListener(null);
}
super.setContentView(layoutResID);
input = findViewById(R.id.input);
View inputDone = findViewById(R.id.input_done);
focusHolder = findViewById(R.id.focus_holder);
input.setOnFocusChangeListener(focusChangeListener);
inputDone.setOnClickListener(onClickListener);
}
}
|
因为我们检测到焦点变化,因此我们还需要添加一些逻辑到setContentView函数中。这样一来我们在调用setContentView时就可以切换这两个布局,此时View的层级关系也会随着改变。因此我们每次都需要找到布局中的子视图,焦点listener我们也需要移除并且重新设置一个到input视图中。
和原来一样,我们需要一个TransitionController来处理焦点变化:
.part2.Part2TransitionController.java
1
2
3
4
5
6
7
8
9
10
11
12
13
14
15
16
17
18
19
20
21
22
| public class Part2TransitionController extends TransitionController {
Part2TransitionController(WeakReference<Activity> activityWeakReference, AnimatorBuilder animatorBuilder) {
super(activityWeakReference, animatorBuilder);
}
public static TransitionController newInstance(Activity activity) {
WeakReference<Activity> activityWeakReference = new WeakReference<>(activity);
AnimatorBuilder animatorBuilder = AnimatorBuilder.newInstance(activity);
return new Part2TransitionController(activityWeakReference, animatorBuilder);
}
@Override
protected void enterInputMode(Activity activity) {
activity.setContentView(R.layout.activity_part2_input);
}
@Override
protected void exitInputMode(Activity activity) {
activity.setContentView(R.layout.activity_part2);
}
}
|
现在我们需要做的只是调用Activity的setContentView函数来切换两个布局。
如果我们现在运行上面的代码,我们可以看到两个布局毫无过度的切换,这必然不是我们想要的。在下一篇文章中,我们将讲解如何在布局切换时添加动画。
本文的源代码在这里。

Manual Layout Transitions – Part 1 by Styling Android is licensed under a Creative Commons Attribution-NonCommercial-ShareAlike 4.0 International License.
Permissions beyond the scope of this license may be available at http://blog.stylingandroid.com/license-information.
